Procedures

Abdominal Aortic Aneurysm (AAA): Endovascular Aortic Repair (EVAR)

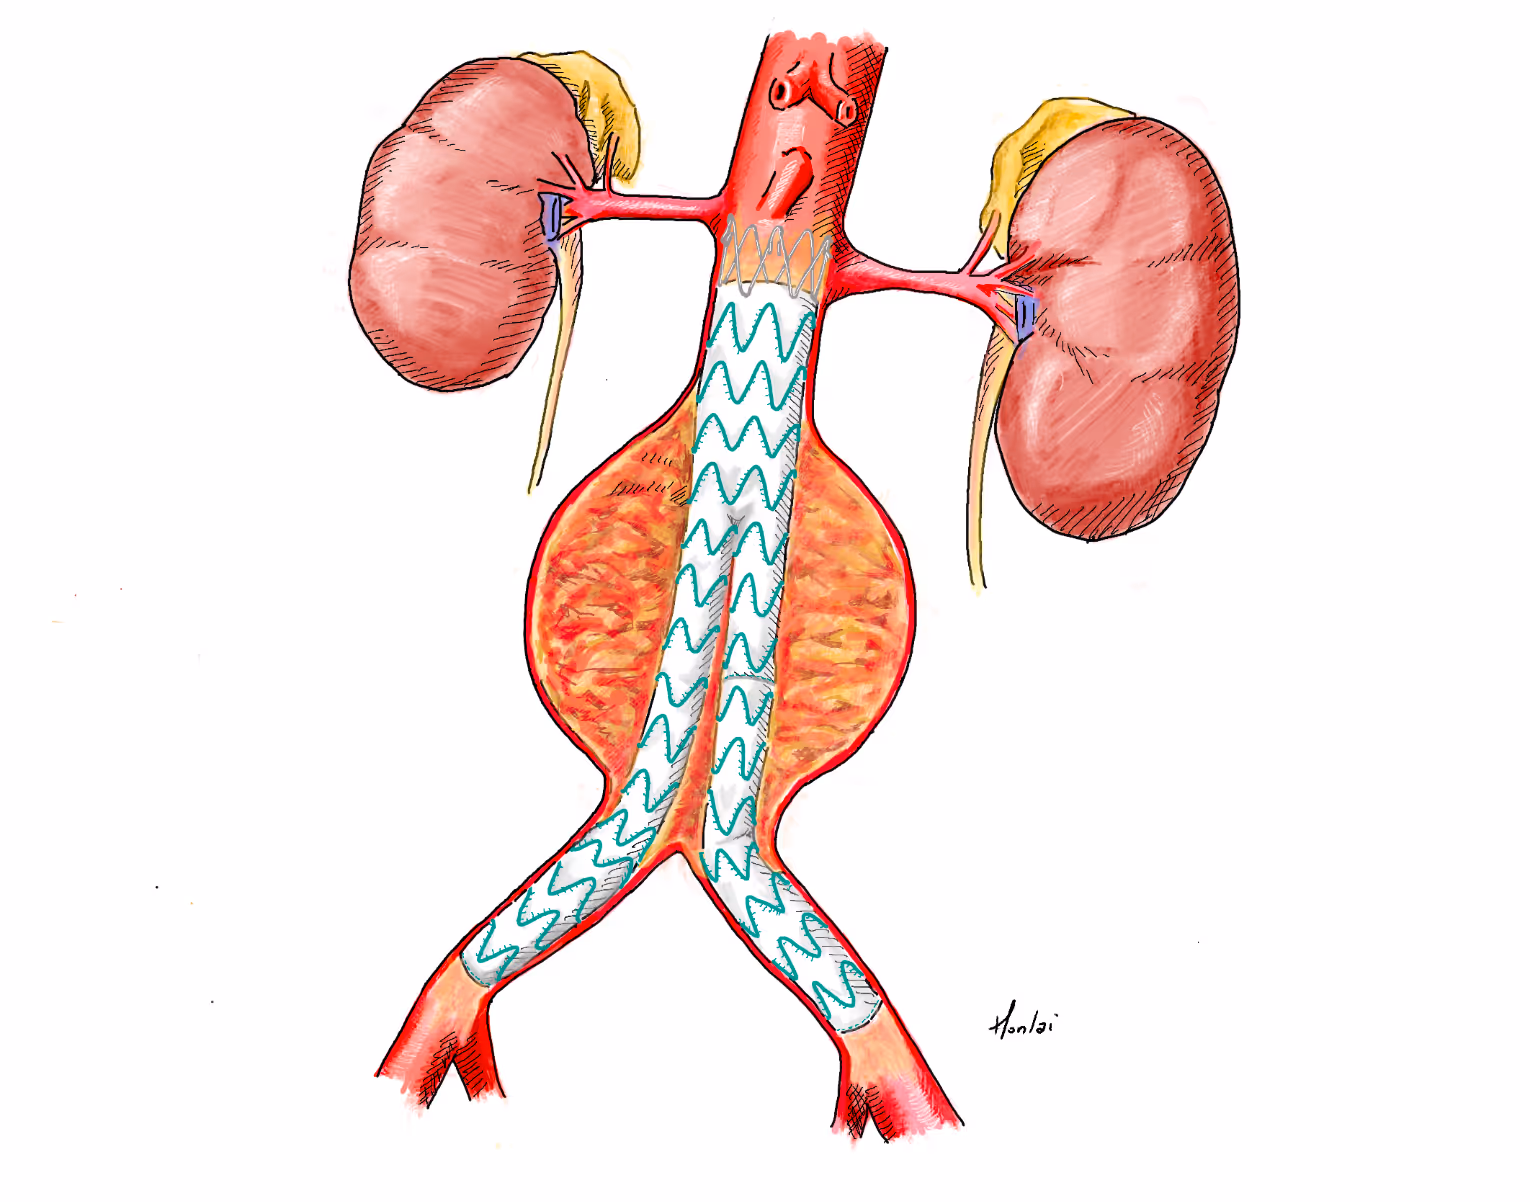
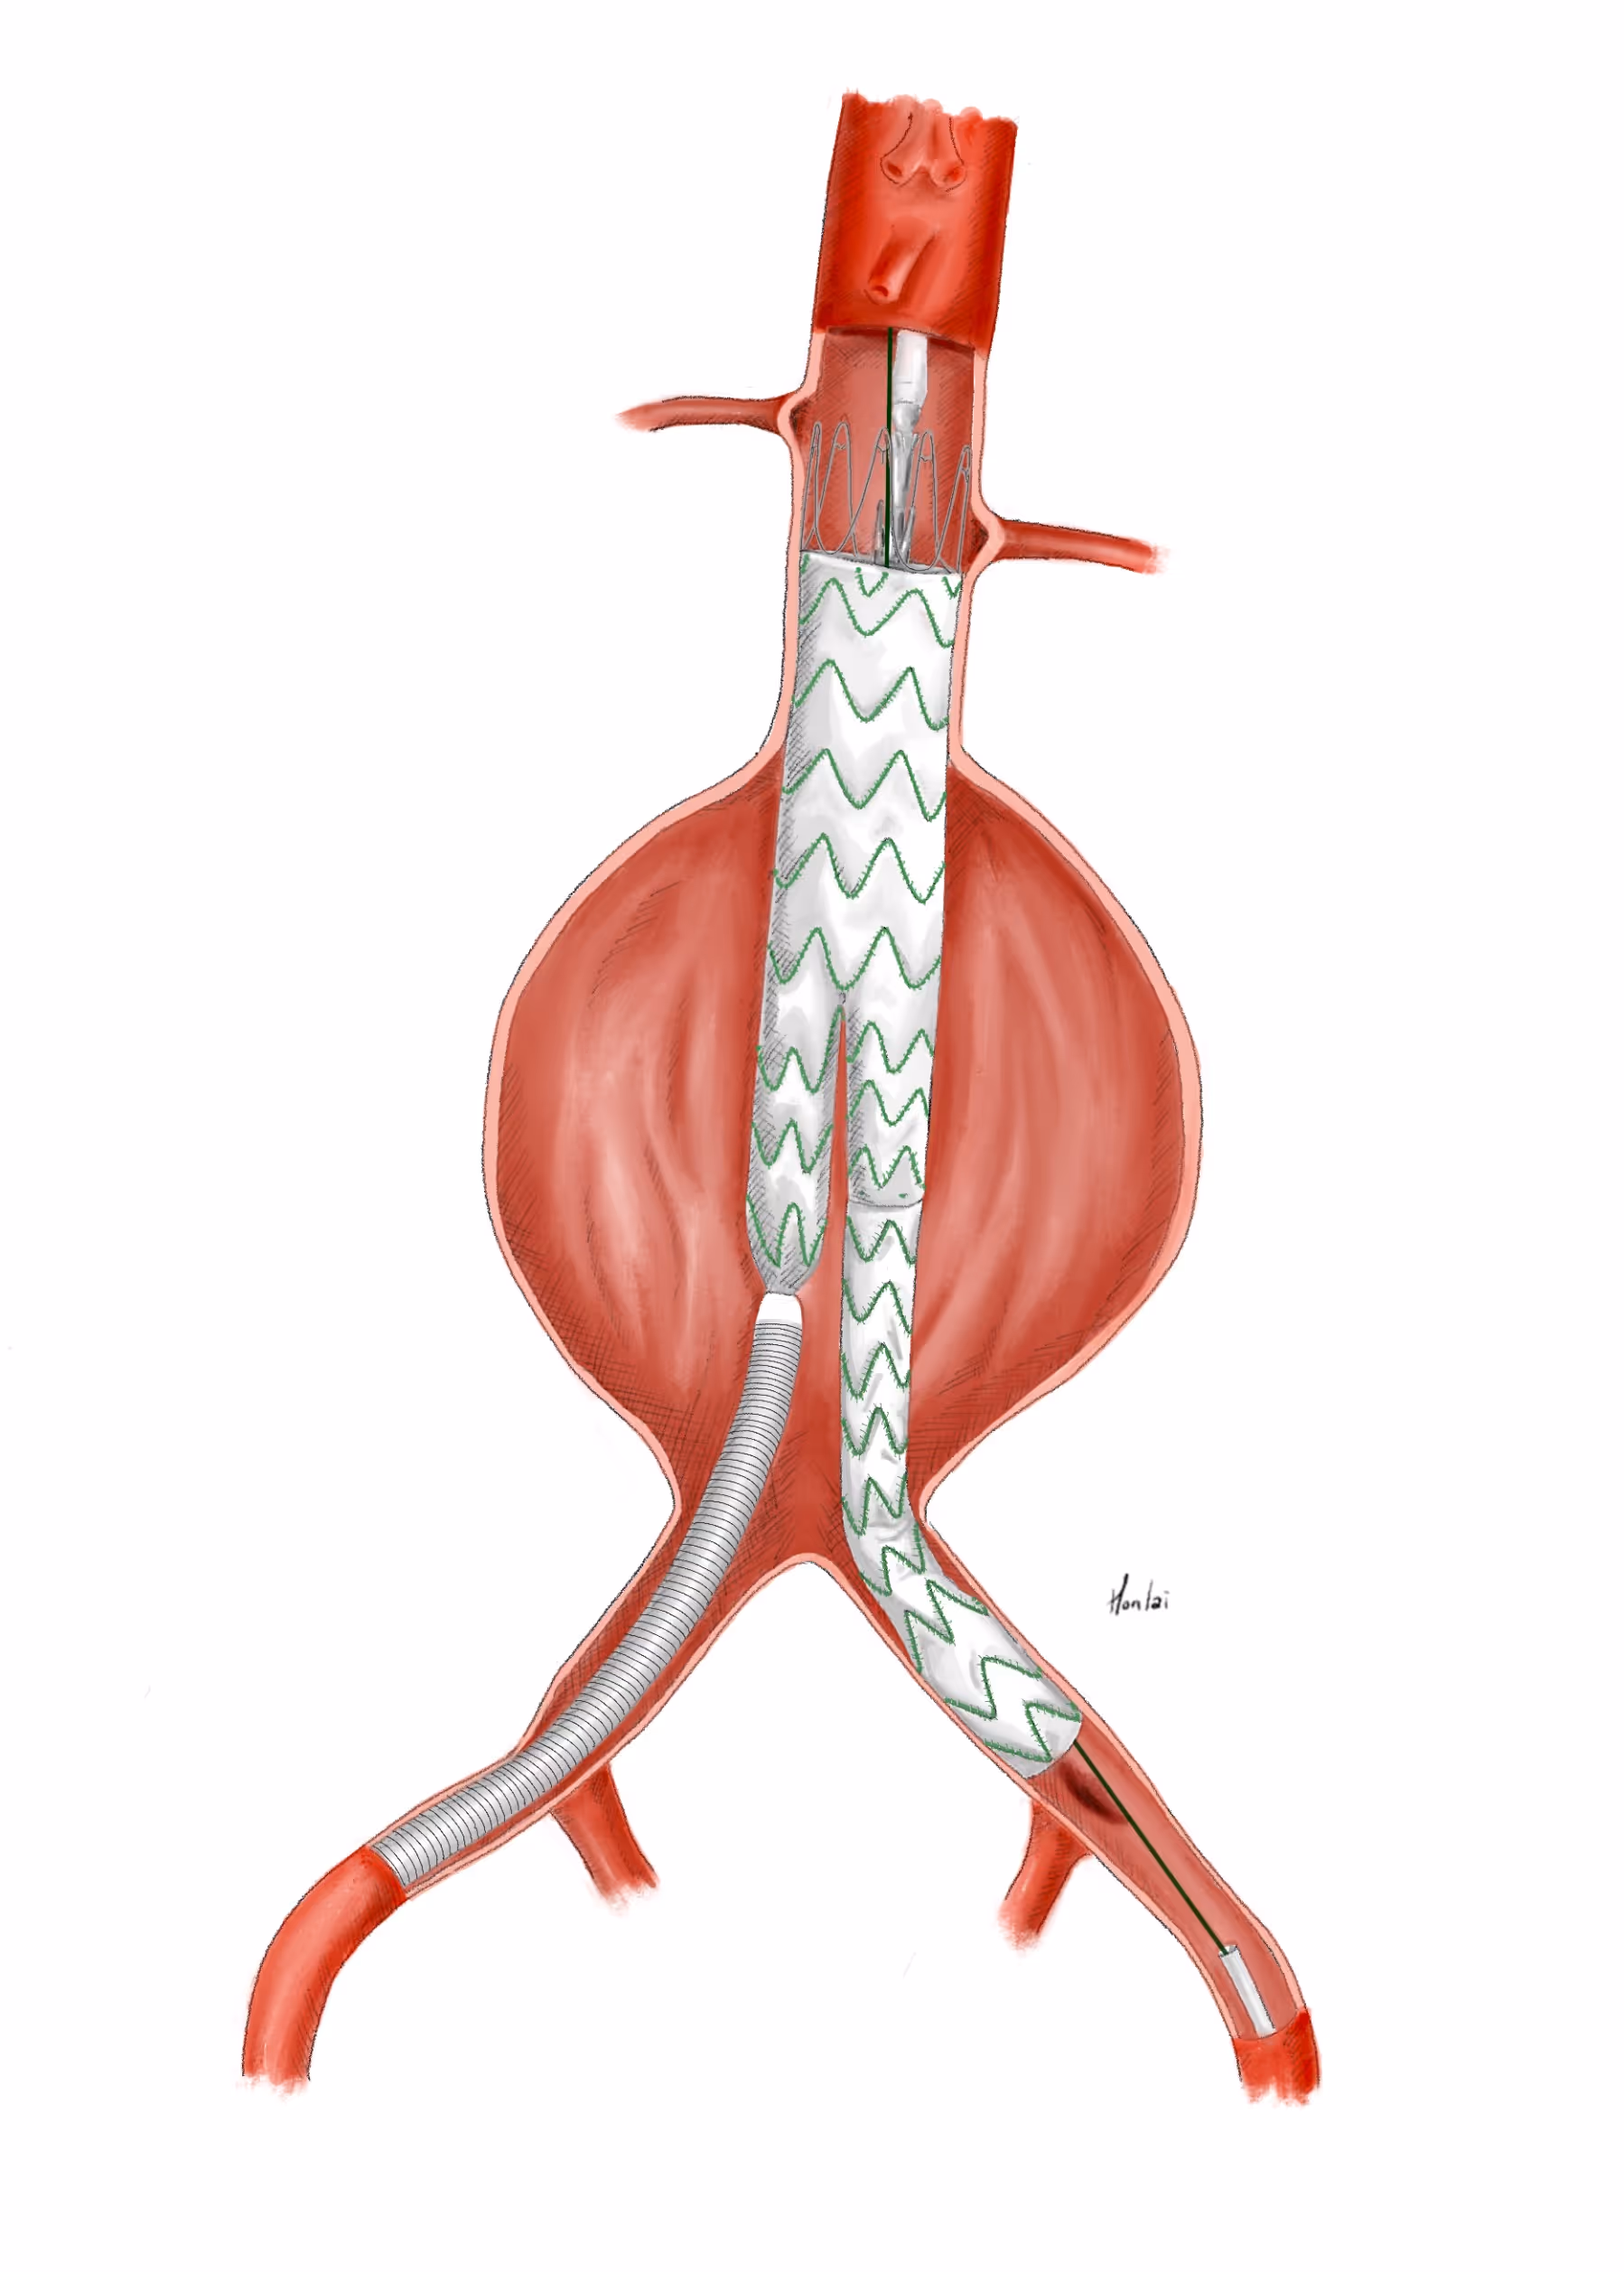
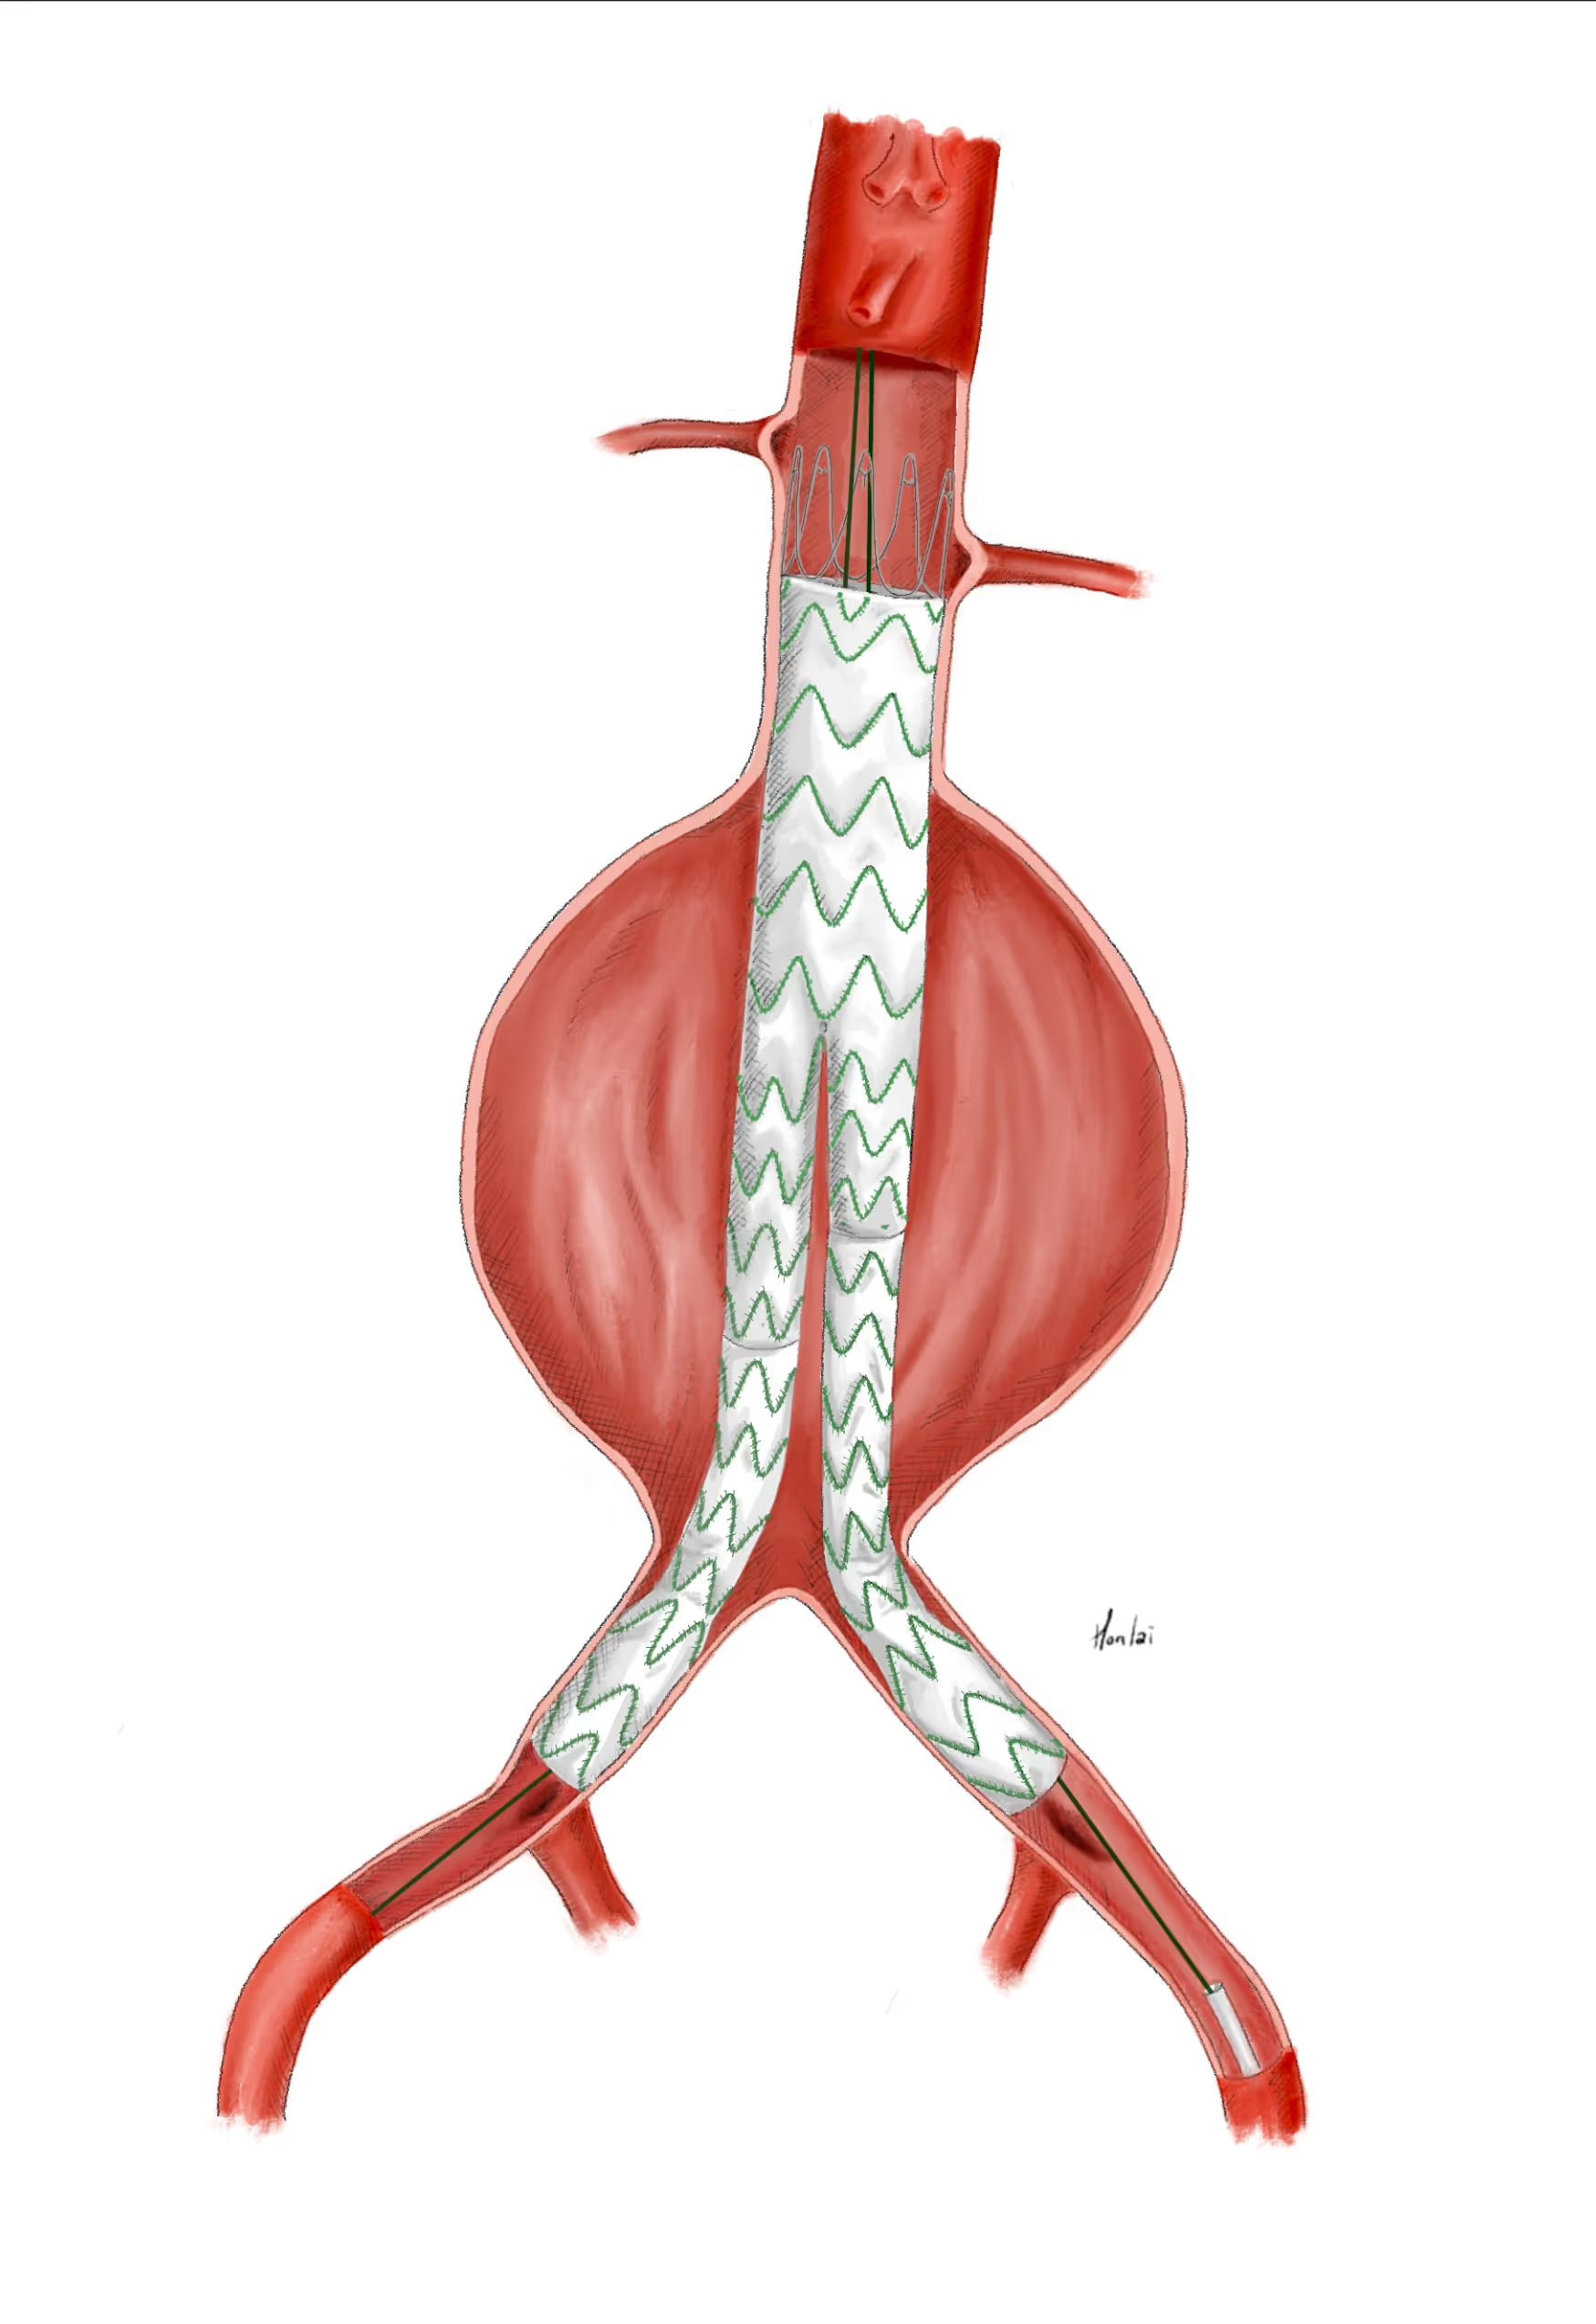
An infrarenal aneurysm,i.e. where there are at least 15mm of non-aneurysmal aorta between the renal arteries and the aneurysm, can usually be treated endovascularly using a standard off-the-shelf stent graft system. However, some additional anatomical conditions must be met for a successful EVAR. These include but are not limited to a cylindrical (as opposed to conical) neck; a neck diameter between 16 and32 (better 28) mm; limited amount of thrombus and calcification in the neck; angulations of the peri- and infrarenal segment within specific limits; a diameter of the aortic bifurcation of at least 16-18mm; iliac arteries that allow the introduction of the delivery systems, are not too kinked and provide adequate sealing zones for the stent grafts.

All Steps in Detail

All Steps in Detail

Step 1: Gaining access to the groin vessels

  1. Scan the entire length of the common femoral arteries by ultrasound to determine the ideal puncture site. It should ideally be located at the level of the femur head while avoiding areas of ventral calcifications, intraluminal thrombus or stenoses. If these prerequisites cannot be met, an open access to the groin vessels should be considered.
  2. Retrograde puncture of both femoral arteries under ultrasound guidance.This means defining the exact entry point of the needle into the artery on ultrasound and then not moving the ultrasound probe. With your other hand, guide the needle in a 45° angle until you identify the tip at your point of entry. When pulsatile flow is exiting the needle, advance the J-tipped steel wire carefully and without resistance. If in doubt, advance under fluoroscopy.
  3. Oblique skin incision around the needle, ca. 1cm long. Then divide the subcutaneous tissue and the subcutaneous fascia using a mosquito clamp and predilate the vessel wall using an 8F dilator.
  4. Apply a pre-close closing system if using, usually two devices per side.
  5. Introduce short 8F sheaths on both sides.

Step 2: Perform your procedure

  1. Bring up soft guidewire (e.g. Terumo) under fluoroscopic guidance to the proximal descending thoracic aorta on the side where you intend to introduce your bifurcated main body.
  2. Exchange via any catheter to a stiff wire (e.g. Lunderquist).
  3. Remove 8F sheath and exchange with large bore sheath if using. Alternatively, if using a sheathless system, bring up your main body.
  4. From the other side, bring up a soft wire and then a pigtail catheter. Position the catheter slightly above the renal arteries (usually somewhere around L2)
  5. Perform an angiogram of the perirenal segment including the infrarenal aorta including the bifurcation. Don’t forget the correct angles for your C-arm (usually around10-15% cranio-caudal).
  6. Deploy your main body just below the lowest renal artery.
  7. Cannulate contralateral limb of the main body using a soft wire and bring up a pigtail catheter.
  8. Make sure your wire / catheter is indeed in the main body by (i) Rotating the pigtail catheter at the level of the proximal sealing zone OR by (ii) Angiogram via pigtail catheter inside the main body OR by (iii) Inflation of compliant balloon half in the contralateral limb and half below.
  9. Use the calibrated pigtail catheter to measure the contralateral length after angiogram of the contralateral iliac bifurcation (CAVE correct angulation of C-arm).
  10. Introduce stiff wire.
  11. Introduce contralateral large bore sheath if using, or alternatively introduce your contralateral limb and deploy.
  12. Depending on your stent graft system: Fully deploy the main body and then extend ipsilaterally if needed.
  13. Balloon entire system using a compliant balloon if using.
  14. Performfinal angiogram.

Step 3: Close your femoral accesses

  1. Remove catheters and sheaths and close accesses using your predeployed closure devices.
  2. If this does not stop bleeding adequately, consider using additional closure devices with an intravascular anchor.
  3. If bleeding still persists, consider compression bandaging or, if bleeding is too strong, perform cutdown and close puncture site as appropriate.

Control of educational objects (tutors and trainees)

Pictures and Drawings

No items found.

Courses Teaching this Procedure

European Vascular Master Class 2026

Jan 21, 2026
 - 
Jan 23, 2026
More Information

Simulators Used for this Procedure

No items found.

About Vascular International

The Vascular International (VI) School for Vascular Surgery is dedicated to advancing the training and education of vascular surgical techniques through the use of lifelike models. With patient safety as the top priority, VI continuously strives to enhance vascular surgery training, ensuring the highest standards of safe and effective open and endovascular patient care.

About Us